Insulation plays a critical role in maintaining your home’s energy efficiency, but over time, it can deteriorate, become damaged, or lose its effectiveness. When this happens, it’s essential to remove the old insulation and replace it with new material to keep your home comfortable and energy-efficient. However, insulation removal can be a complex task if not done properly. In this blog post, we’ll walk you through the steps for a smooth insulation removal process and how to ensure it’s done correctly.
If you’re looking to learn more about the benefits of spray foam insulation for your home or need help with your insulation removal project, this guide is for you.
Why Insulation Removal Is Important
Before diving into the steps of the removal process, it’s important to understand why insulation removal is necessary. Over time, insulation can accumulate dust, dirt, pests, and moisture, making it less effective. Old or damaged insulation can lead to:
- Higher energy bills: Ineffective insulation forces your HVAC system to work harder to maintain comfortable temperatures.
- Poor indoor air quality: Insulation that’s infested with mold, mildew, or pests can contribute to health issues by releasing harmful particles into the air.
- Uncomfortable living conditions: Damaged insulation won’t regulate temperatures properly, leading to hot or cold spots in your home.
By replacing old insulation, you not only improve energy efficiency but also create a healthier living environment.
Step 1: Assess the Condition of Your Existing Insulation
The first step in the insulation removal process is to assess the condition of your current insulation. You’ll need to check for:
- Signs of damage: Look for mold, mildew, water stains, or signs of pest infestation.
- R-value performance: The R-value measures how well insulation resists heat flow. If your insulation’s R-value is low, it’s no longer performing effectively.
- Visible gaps or deterioration: Over time, insulation can settle or degrade, leaving gaps where air can easily escape.
An experienced insulation contractor can help you conduct a thorough assessment and discover how an experienced insulation contractor can help you to save on energy bills by recommending the best course of action.
Step 2: Plan for Safe Removal
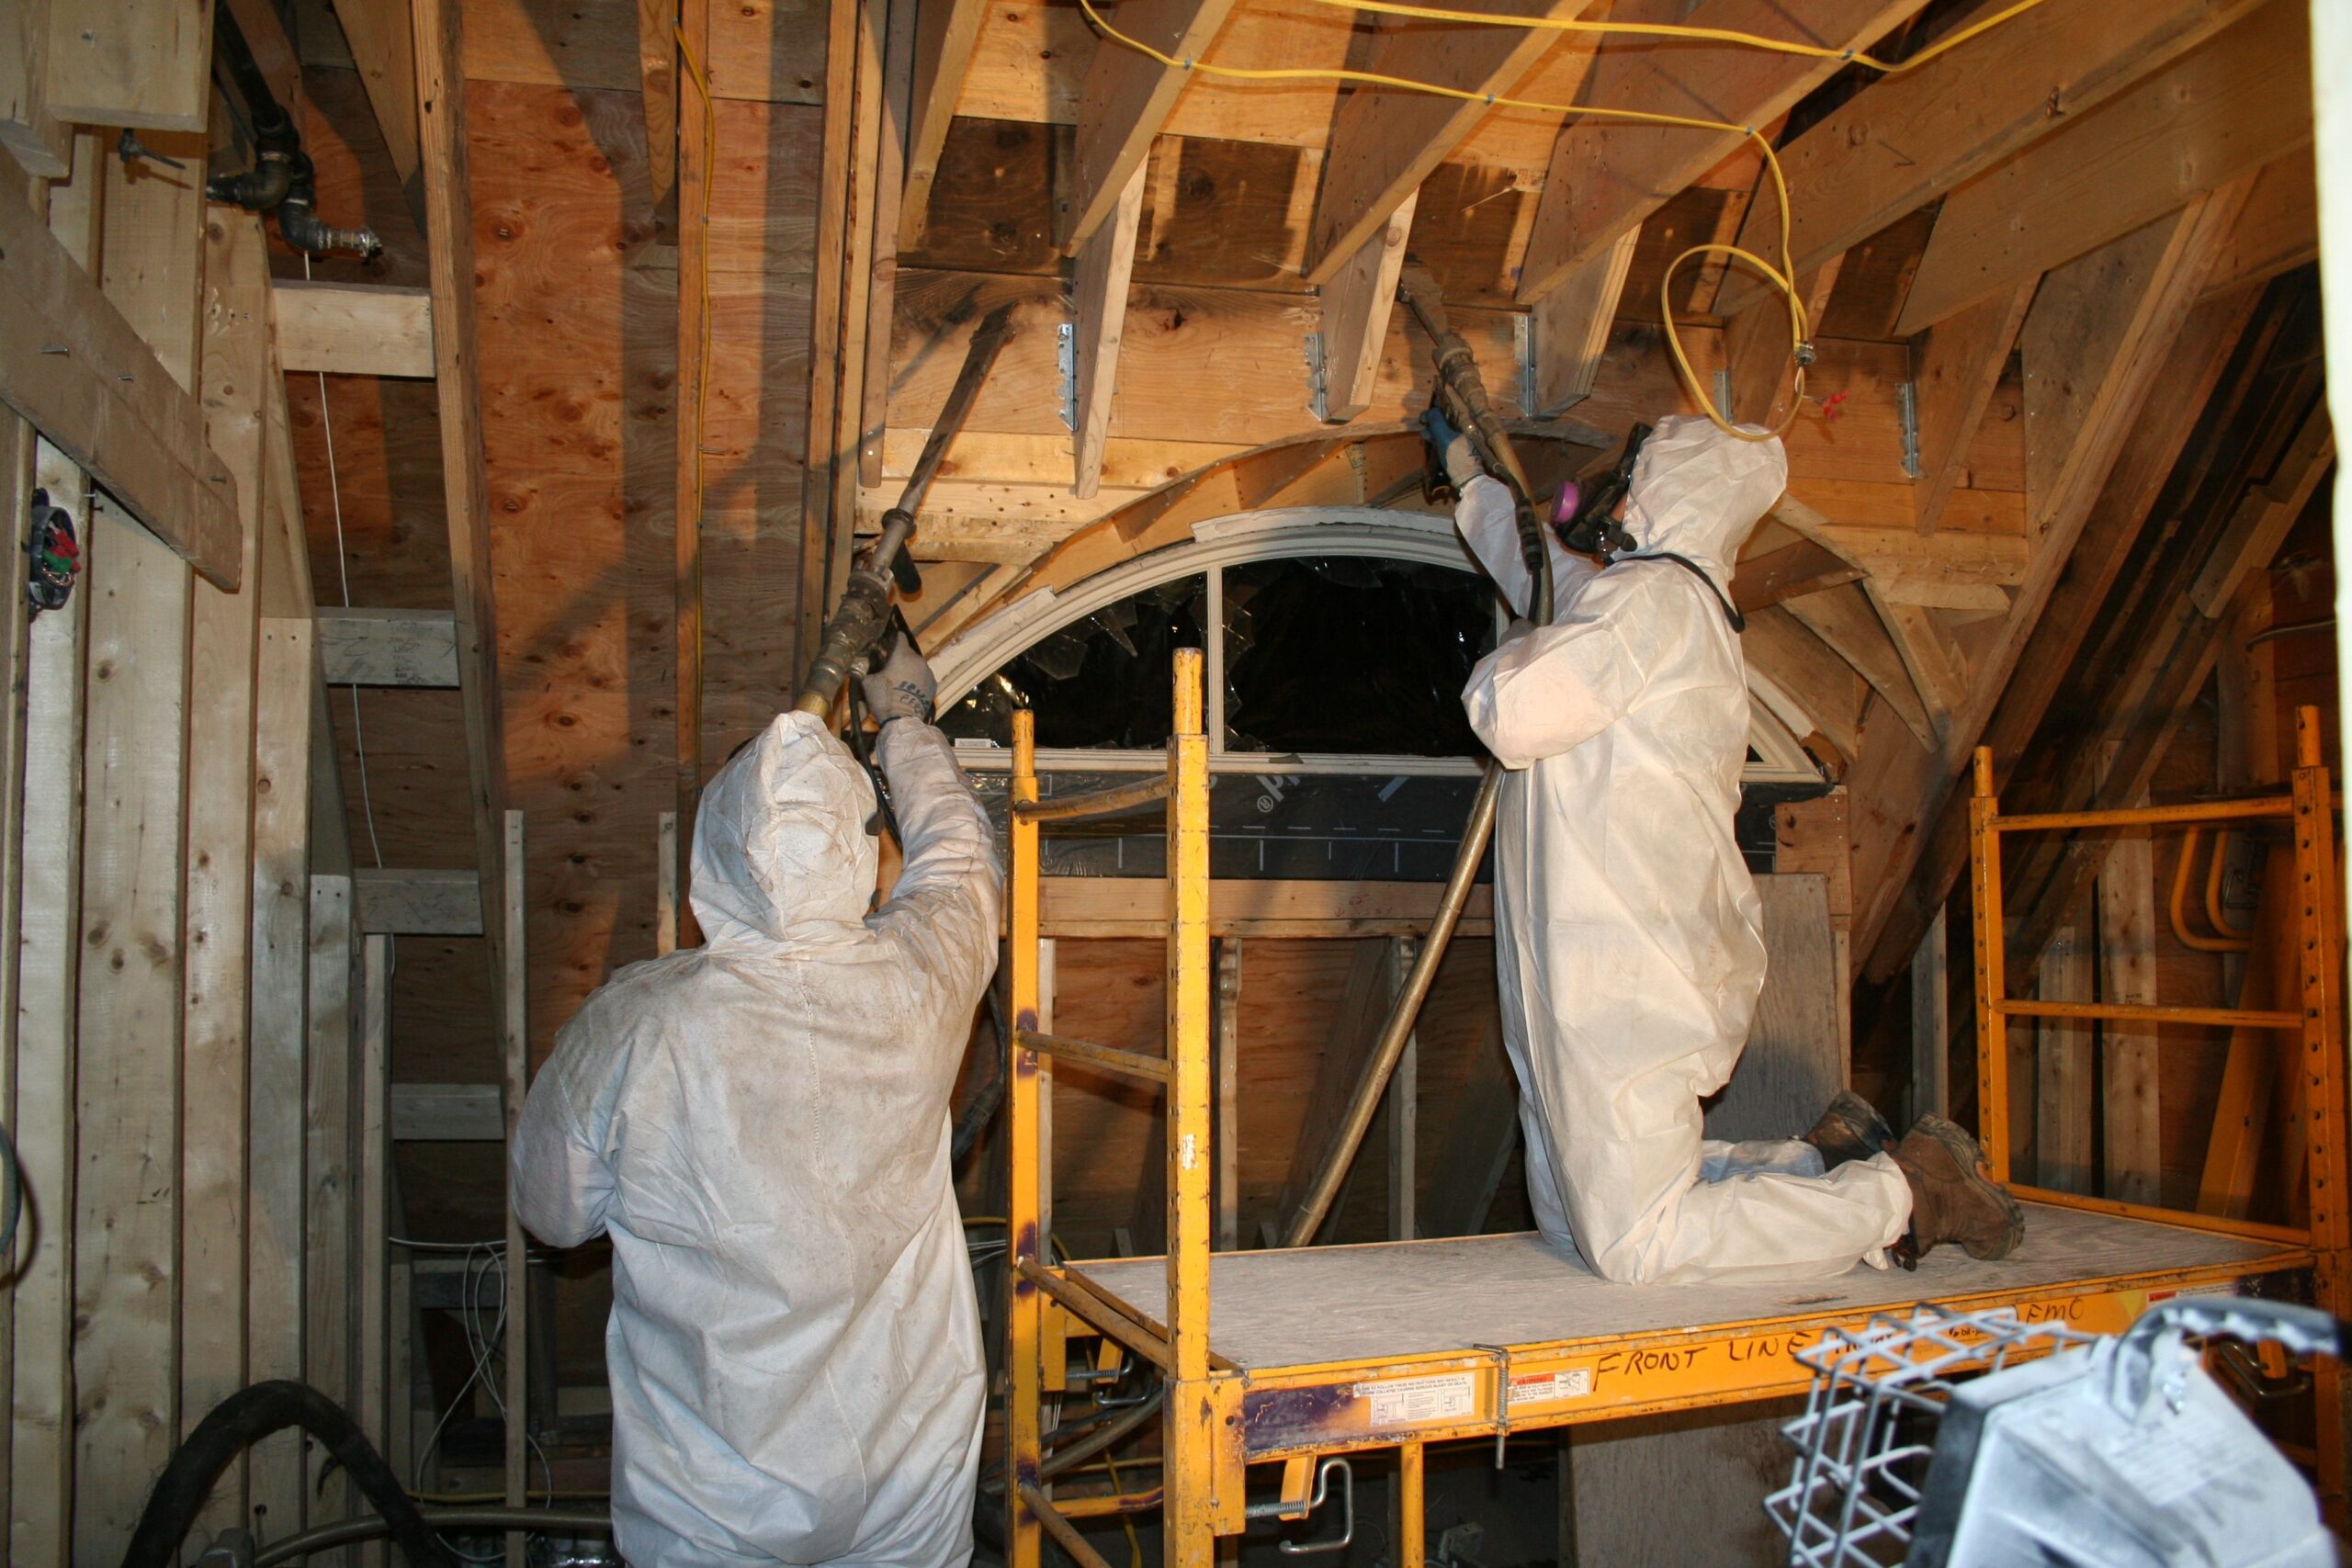
Once you’ve assessed the condition of your insulation and determined that removal is necessary, the next step is to plan for a safe removal process. It’s crucial to take safety precautions, especially if you’re dealing with older insulation materials such as fiberglass or asbestos-containing products, which can pose health risks.
Safety Measures for Insulation Removal:
- Wear protective gear: Proper safety gear, including gloves, goggles, and a respirator mask, should be worn to protect yourself from airborne particles.
- Seal off the work area: To prevent contaminants from spreading to other areas of your home, seal off the work area using plastic sheeting or tarps.
- Proper ventilation: Ensure that the work area is well-ventilated to minimize the buildup of dust and other particles.
Hiring a professional contractor to handle the removal ensures that safety measures are strictly followed, and all debris is disposed of properly.
Step 3: Choose the Right Removal Method
Depending on the type of insulation in your home, different removal methods may be required. Common types of insulation include:
1. Blown-in Insulation
Blown-in insulation, typically made of fiberglass or cellulose, is removed using a large vacuum. This equipment is designed to suck up the loose insulation material, making the process efficient and minimizing the spread of dust.
2. Batt Insulation
Batt insulation is typically made from fiberglass and comes in large, pre-cut sections. To remove batt insulation, it must be carefully pulled from between the studs or joists and placed in sealed bags for disposal.
3. Spray Foam Insulation
Removing spray foam insulation can be more complicated. Spray foam adheres to surfaces and hardens over time, so it requires scraping or cutting to remove. It’s often best to leave this to professionals who have the right tools and experience.
Choosing the right removal method for your insulation will depend on its material, how it was installed, and the condition it’s in. Read this guide to find the right insulation company for your project and ensure your removal process goes smoothly.
Step 4: Clean the Work Area
Once the insulation has been removed, it’s essential to thoroughly clean the work area. Insulation debris, dust, and contaminants can linger, so cleaning the space ensures that it’s safe for new insulation to be installed.
Cleaning Tips:
- Vacuum thoroughly: Use a HEPA-filtered vacuum to remove any remaining dust or debris.
- Inspect for any damage: Check the area for any signs of mold, pests, or water damage that may need to be addressed before installing new insulation.
- Repair any gaps: Now is the perfect time to seal any gaps or cracks that may have contributed to poor insulation performance.
Proper cleaning not only ensures a smooth installation of new insulation but also prevents any future issues that may arise from leftover contaminants.
Step 5: Install New Insulation
Once the old insulation has been removed and the area has been cleaned, it’s time to install new insulation. The type of insulation you choose will depend on your specific needs, such as improving energy efficiency or reducing noise. Options include:
- Spray foam insulation: Known for its superior air sealing and energy-saving benefits.
- Blown-in insulation: Effective for hard-to-reach areas and offering good thermal performance.
- Fiberglass batt insulation: A more traditional option, often used in walls, floors, and ceilings.
By choosing the right insulation for your home, you’ll be able to maximize energy efficiency, reduce noise, and improve overall comfort. Check out their services for insulation solutions tailored to your needs and find the right solution for your home.
Step 6: Proper Disposal of Old Insulation
One final, yet important, step in the insulation removal process is ensuring that the old insulation is properly disposed of. Insulation materials, especially if they contain hazardous substances like asbestos, must be handled with care. Always follow local regulations regarding disposal and recycling.
Professionals can manage the disposal for you, ensuring that the removed insulation is safely and responsibly handled.
FAQs on Insulation Removal
1. Why should I remove old insulation?
Old insulation can lose its effectiveness, leading to higher energy bills and reduced comfort. Additionally, damaged insulation can harbor mold, pests, or allergens, affecting your home’s air quality.
2. Can I remove insulation myself?
While it’s possible to remove insulation yourself, it’s highly recommended to hire professionals, especially if you’re dealing with older or hazardous materials. Professional contractors ensure the job is done safely and effectively.
3. How long does insulation removal take?
The time it takes to remove insulation depends on the size of the area and the type of insulation. On average, it can take a day or two for a professional team to complete the process.
4. What types of insulation require special care during removal?
Fiberglass insulation, asbestos-containing materials, and spray foam insulation may require special handling due to health risks or the complexity of removal.
5. Can I replace insulation immediately after removal?
Yes, once the old insulation is removed, cleaned, and inspected, you can install new insulation right away, ensuring your home maintains energy efficiency and comfort.
Conclusion
Insulation removal is a crucial step when dealing with old or damaged insulation that no longer serves its purpose. By following the proper steps—assessing the condition of your insulation, planning for safe removal, choosing the right removal method, cleaning the work area, and installing new insulation—you can ensure a smooth and efficient process.
For homeowners in Pensacola, Florida, and surrounding areas including Milton, Pace, Navarre, Crestview, Gulf Breeze, and Foley, Alabama, Prestige Insulation Solutions, LLC provides expert insulation removal and installation services to help you improve your home’s energy efficiency.
Call Prestige Insulation Solutions, LLC today at (850) 429-4969 to schedule your insulation removal and replacement project!